

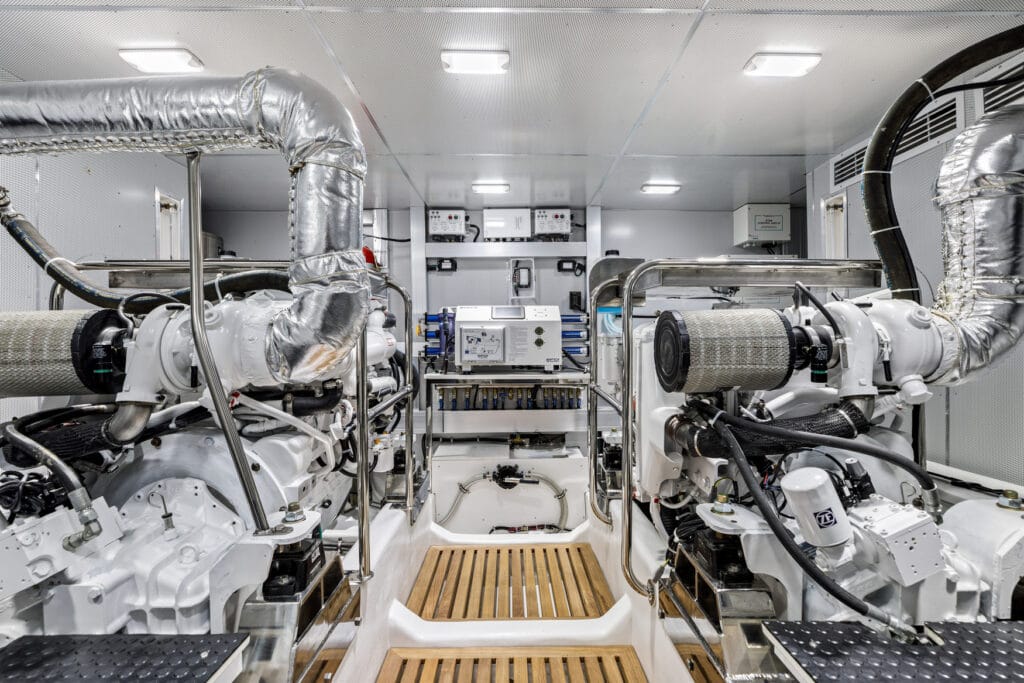
A finished boat at a show can look immaculate. The cushions are pristine, the joinery is polished, and the bilge is spotless. The real test of a cruising yacht begins six months or five years later, when an air conditioning raw-water pump fails in an unfamiliar anchorage, or when you decide to install a new satellite receiver before an extended offshore passage.
At that point, your cruising life is dictated by serviceability: how quickly you or a technician can reach a component, diagnose it, remove it, and pull new cable without destroying interior woodwork. Evaluating access before you purchase prevents costly frustrations down the road. While machinery-specific checks belong in an engine room inspection, evaluating the broader electrical and mechanical infrastructure throughout the living spaces requires an equally disciplined eye.
The Three Tiers of Access: Visibility, Reach, and Extraction
Visibility is not accessibility. An easy mistake during a walkthrough is peering into an inspection hatch, spotting a valve or junction box with a flashlight, and assuming the component is serviceable.
Real-world maintenance requires three distinct levels of access:
- Visual Confirmation: You can inspect the part directly to check for leaks, corrosion, chafe, or heat discoloration without using a mirror or a smartphone camera on a stick.
- Tool and Hand Clearance: You can reach the component with two hands and physically seat a wrench, crimper, or screwdriver with adequate swing clearance.
- Extraction Clearance: You can disconnect the unit and lift it completely clear of the compartment without disassembling structural bulkheads, permanent cabinetry, or high-pressure plumbing lines.
When inspecting a vessel, test these physical realities. If a fresh-water manifold or sanitation valve is tucked behind a salon settee, ask the owner or representative to demonstrate the access and appropriate operation. Ask the broker or builder to demonstrate how a domestic water pump is pulled for service. If removing a routinely serviced component requires moving other equipment or cabinetry, record that work and ask how it affects maintenance.
Tracing Backbone Infrastructure Through Finished Living Spaces
A well-designed cruising yacht integrates access points directly into its interior joinery. If every service job requires breaking glued joints or prying out delicate trim pieces, routine maintenance will inevitably leave cosmetic scars.
Look for how the builder treated overheads, bulkheads, and dead spaces. Our 45 Pilothouse has access hatches, removable headliners and removable wiring-chase and access panels. These are useful starting points for an access discussion; ask to see the actual routes and openings for the configuration you are considering.
Keep in mind that specifications and layouts evolve; when reviewing the 45 Pilothouse equipment list for a specific build or vintage, verify the exact routing paths provided for that hull. When touring any yacht, check the following interior access points:
- Removable Headliners: Ask how overhead panels are removed and refitted without damage. Running an antenna wire or radar cable down the mast arch into the dash should not require peeling back vinyl.
- Chases with Messenger Lines: Open the cabinetry and check whether cable chases include dedicated pull strings or adequate internal diameter to swallow additional bundled connectors.
- Sub-Floor Hatches: Inspect the undersides of floorboards. Quality hatches feature finished underside sealing, finger pulls or lifting hardware, and gutters designed to divert minor spills away from the bilge wiring runs.
- Helm Console Backing: Ask to see the service access behind the main navigation station. If the electronics dash cannot tilt forward or be accessed from an adjacent service door, a simple chartplotter replacement will become an exhausting, contorted ordeal.
Wiring Identification: Schematics, Labeling, and Aftermarket Additions
Understandable wiring and documentation help a technician trace a circuit. An unmarked bundle can make that work harder, even when the finished panel looks tidy.
When evaluating an electrical system, focus on how runs are identified and documented:
- Numbered and Color-Coded Tinned Wire: High-grade marine electrical systems use tinned copper wire to resist internal corrosion. Look for heat-stamped numbers or persistent label tags at both ends of each wire run, keyed directly to a comprehensive schematic.
- Terminal Blocks and Bus Bars: Look for understandable connections and documentation; have a qualified electrician assess questionable terminations rather than judging them by appearance alone. Have qualified personnel demonstrate panel access where it can be done safely. Ask how the wiring is supported, identified and protected.
- As-Built Documentation: Ask to review the electrical schematics included with the yacht. Confirm whether factory additions and options are reflected on the prints. When taking delivery of a vessel, verifying that final system modifications match the new yacht handover documents ensures you have an accurate reference for future troubleshooting.
- Legacy and Aftermarket Splices: On pre-owned yachts, look carefully for abandoned wire runs left behind by past electronics swaps. Unlabeled additions or changes that do not match the drawings deserve clarification and, where appropriate, review by a qualified marine electrician.
Your goal during a pre-purchase walk-through is not to conduct a formal compliance audit, but to confirm that an outside technician can read the panel, identify the target circuit immediately, and isolate it safely.
Field-Testing an Upgrade: A Hypothetical Walkthrough
The easiest way to understand the service friction of a boat is to walk through a hypothetical equipment upgrade with the builder, broker, or your surveyor. Choose a realistic scenario: adding a high-draw inverter, an auxiliary sensor network, or a satellite communication terminal on the hardtop.
Trace the proposed path step by step:
- The Mounting Point: How does the cable exit the radar arch or mast? Is there an accessible penetration with a water-tight seal, or will you have to drill through an un-cored section with zero interior access?
- The Chase: How does the cable transition from the exterior arch to the interior pilothouse overhead? Look for the physical conduit. Is there physical space inside the existing run, or is the chase already jammed to capacity?
- The Helm Interface: How does the new equipment link to the primary helm displays? Can you access the NMEA 2000 or Ethernet backbone without dropping the entire salon ceiling?
- Power and Isolation: Where does the unit tie into the DC house system? Is there a designated spare breaker slot on the distribution panel, or will you need to install an auxiliary fuse block? Where would that block be mounted, and can it be isolated without shutting down primary navigation systems?
If the walkthrough reveals pinch points, ask which future changes they could affect and what access work would be involved.
Pre-Purchase Serviceability Inspection Checklist
Use this checklist during your personal inspection to record potential access conflicts. When practical, have a certified technician or surveyor review the items that present high access friction.
| Inspection Point | What to Verify | Red Flags to Record |
|---|---|---|
| Dash and Helm Access | Removable panels, tilt-out consoles, or walk-in access behind primary navigation displays. | Completely sealed fiberglass dash faces; back of electronics visible only through a 4-inch cupholder hole. |
| Wiring Loom Management | Tinned wire, strain-relieved bundles, dedicated terminal strips, and clear labeling throughout. | Hanging unsupported wiring bundles; loose wire nuts; unlabeled spliced wires dangling near bilge water. |
| Overhead Wiring Paths | Fastened, removable headliner panels or ceiling chases from arch/mast down to the pilothouse. | Glued or stapled headliners requiring upholstery work to route a single communication cable. |
| Pump and Plumbing Runs | Pump installation appropriate to its function, with access for inspection, service and removal. | Pumps wedged beneath structural stringers or permanently installed joinery with no wrench clearance. |
| Under-Floor Routing | Understandable routes and accessible inspection points; qualified review of separation and protection where needed. | Electrical cables run directly on the bottom of the hull bilge where they remain submerged in wet areas. |
| System Schematics | Complete, legible wiring diagrams matching the breaker layout and handover manuals. | Missing wiring diagrams, outdated prints, or modifications without clear circuit identification. |
Treat this evaluation as an operational baseline. Integrating this review alongside your commissioning checklist helps you consider service work alongside everyday operation.
Inspecting for Long-Term Ownership
A cruising yacht is an investment in freedom, but that freedom depends on self-sufficiency. If access points are well-engineered, the owner or technician has a clearer starting point for inspection and repair. If access is an afterthought, minor repairs turn into days of dismantled joinery.
When evaluating a boat, look past the surface styling. Turn the latches, open the access doors, look inside the chases, and ask the hard questions about how the boat will be maintained over the next decade. If you would like to inspect how we approach access, wiring runs, and service architecture on our own hulls, contact our team to discuss specific configurations and available walkthrough options.