

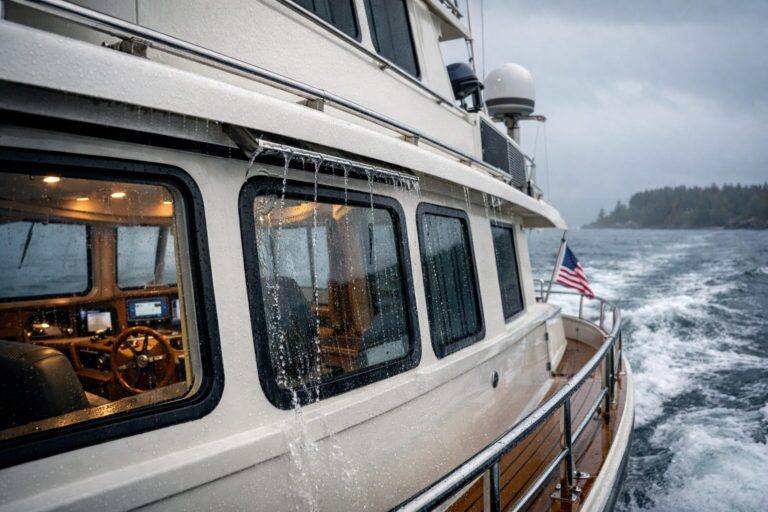
A puddle on the pilothouse console does not necessarily mean the seal directly above it has failed. Marine glazing systems operate on two distinct principles: external barrier seals that block driven water, and internal drainage tracks designed to catch and route away whatever bypasses moving sashes or outer lips.
When water shows up on an interior trim piece, tracking its entry point requires understanding how the window manages moisture before reaching for a tube of sealant.
Water Paths vs. Sealing Boundaries
Water follows the path of least mechanical resistance. Driven rain or heavy spray hitting a forward-facing pilothouse window exerts dynamic pressure across the glass, the frame, and the mounting perimeter. If water breaches an exterior gasket or bedding margin, gravity and capillary action take over.
Water often enters at an upper corner, travels laterally along a hidden internal frame channel, and drips down through an interior headliner or valence several feet away. Fastener penetrations, wiring channels, and interior liner interfaces create continuous paths for water to travel before it exposes itself inside the bridge.
Structural construction determines how that water moves through the cabin sides. On our 49 Pilothouse exterior, the superstructure is built primarily with closed-cell foam coring to reduce topside weight and lower the center of gravity. That construction fact does not identify a leak path; the actual frame, cutouts and installation need inspection.
Confusing a drainage path with a sealing boundary leads to common maintenance errors. External window frames often incorporate controlled drainage paths, including lower weep slots or scuppers. Sealing these discharge points traps trapped moisture inside the frame cavity, forcing water inboard behind interior joinery.
Identify the Specific Window Assembly and Frame Type
Before conducting inspections or applying cleaning agents, locate the specific manufacturer, model number, and installation specifications for your yacht’s glazing. Window designs vary considerably across production years, model lines, and bridge locations.
Fixed direct-glazed panels behave differently than heavy aluminum clamp-ring assemblies or sliding sash units. Each design handles weather loads, frame expansion, and moisture evacuation differently. Balancing direct visibility, frame strength, and ventilation involves distinct pilothouse window tradeoffs that dictate how seals are loaded.
Use the window assembly care instructions for the actual installed product. Window care is assembly-specific. There is no universal marine sealant, torque pattern, or service interval that applies to every yacht. For example, Lewmar’s Portlight/Fixedlight Fitting Instructions (B5960, Issue E) include assembly-specific care:
-
Verifying smooth mechanical operation.
-
Checking positive closing and locking engagement.
-
Ensuring even, uniform pressure across the seal perimeter.
-
Washing with soap, water and a soft cloth, and avoiding abrasive or solvent cleaners on the window.
Inspecting Drains and Gaskets Without Altering Geometry
Routine inspection should focus on cleanliness, alignment, and material condition. You do not need to disassemble frames or force compression adjustments during regular bridge checks.
Observing Accessible Drainage
Identify which openings are intended to drain water before doing any cleaning. Look for visible debris, pooling and changes from the assembly’s normal condition. Follow its manufacturer’s care instructions; do not enlarge drains, seal intended outlets or insert tools into unfamiliar channels.
Observing Closure and Seals
Look for visible damage, loose components and uneven closure. Record what you see without tightening fasteners or changing compression settings. Those adjustments and any disassembly should follow the exact assembly instructions or professional advice.
How to Document a Leak for Professional Diagnosis
If an interior leak appears, document the failure methodically before scheduling service:
-
Record the Environmental Conditions: Note whether the leak occurred during a heavy rainstorm at the dock, during an offshore transit into head seas, or following a deck washdown. Note the vessel’s trim and the direction of the wind relative to the pilothouse.
-
Track the Physical Exit: Identify exactly where water first drips or pools. Avoid tearing into fixed joinery immediately, but dry the area completely and apply paper towels along internal bulkheads to establish the water’s entry timeline.
-
Capture Focused Media: Take wide-angle photographs showing the overall window position relative to the helm, paired with macro photos of the suspected external area, frame joints, and internal egress point.
-
Discuss testing: Ask the attending technician how a controlled leak test should be carried out for the actual assembly. Avoid improvising a pressure test or dismantling joinery before the cause is assessed.
A qualified marine yard can use these observations and the assembly documentation to investigate the cause and recommend suitable repair work.
Reviewing Your Helm Setup
Understanding how pilothouse glazing, drainage tracks, and structural cutouts interact allows you to spot minor wear before water damages electronics or interior wood finishes. If you want to review the exact window specifications, care limits, or bridge arrangements for your vessel, talk with us to discuss your hull details.